System requirements
Before installing, make sure your environment meets these minimums:
- Joomla 5.0+ or Joomla 6.1+. The module works on both major series.
- PHP 8.2 or higher. This matches Joomla 6.1's own requirement.
- A template that loads Bootstrap Icons. Most modern Joomla templates do; if yours doesn't, navigation arrows and pagination icons will render as empty boxes.
- JavaScript enabled in the visitor's browser. The slider degrades to a vertical stack of slides without JS, which is fine for accessibility but loses transitions.
No third-party PHP libraries, no Composer packages, no jQuery required. The module ships everything it needs.
Download the module
The latest Free release is published on GitHub:
github.com/vpjoomla/mod_vp_swiper_slider/releases/latest
Scroll down to the Assets section and download mod_vp_swiper_slider_v3.0.0.zip (the version number will reflect the latest release).
The Pro editionPRO is available through the product page on vpjoomla.com. After purchase, the Pro ZIP is delivered to your account where you can download it any time during the support period.
Install the module in Joomla
Once you have the ZIP file, install it like any other Joomla extension:
- Log in to your Joomla admin panel.
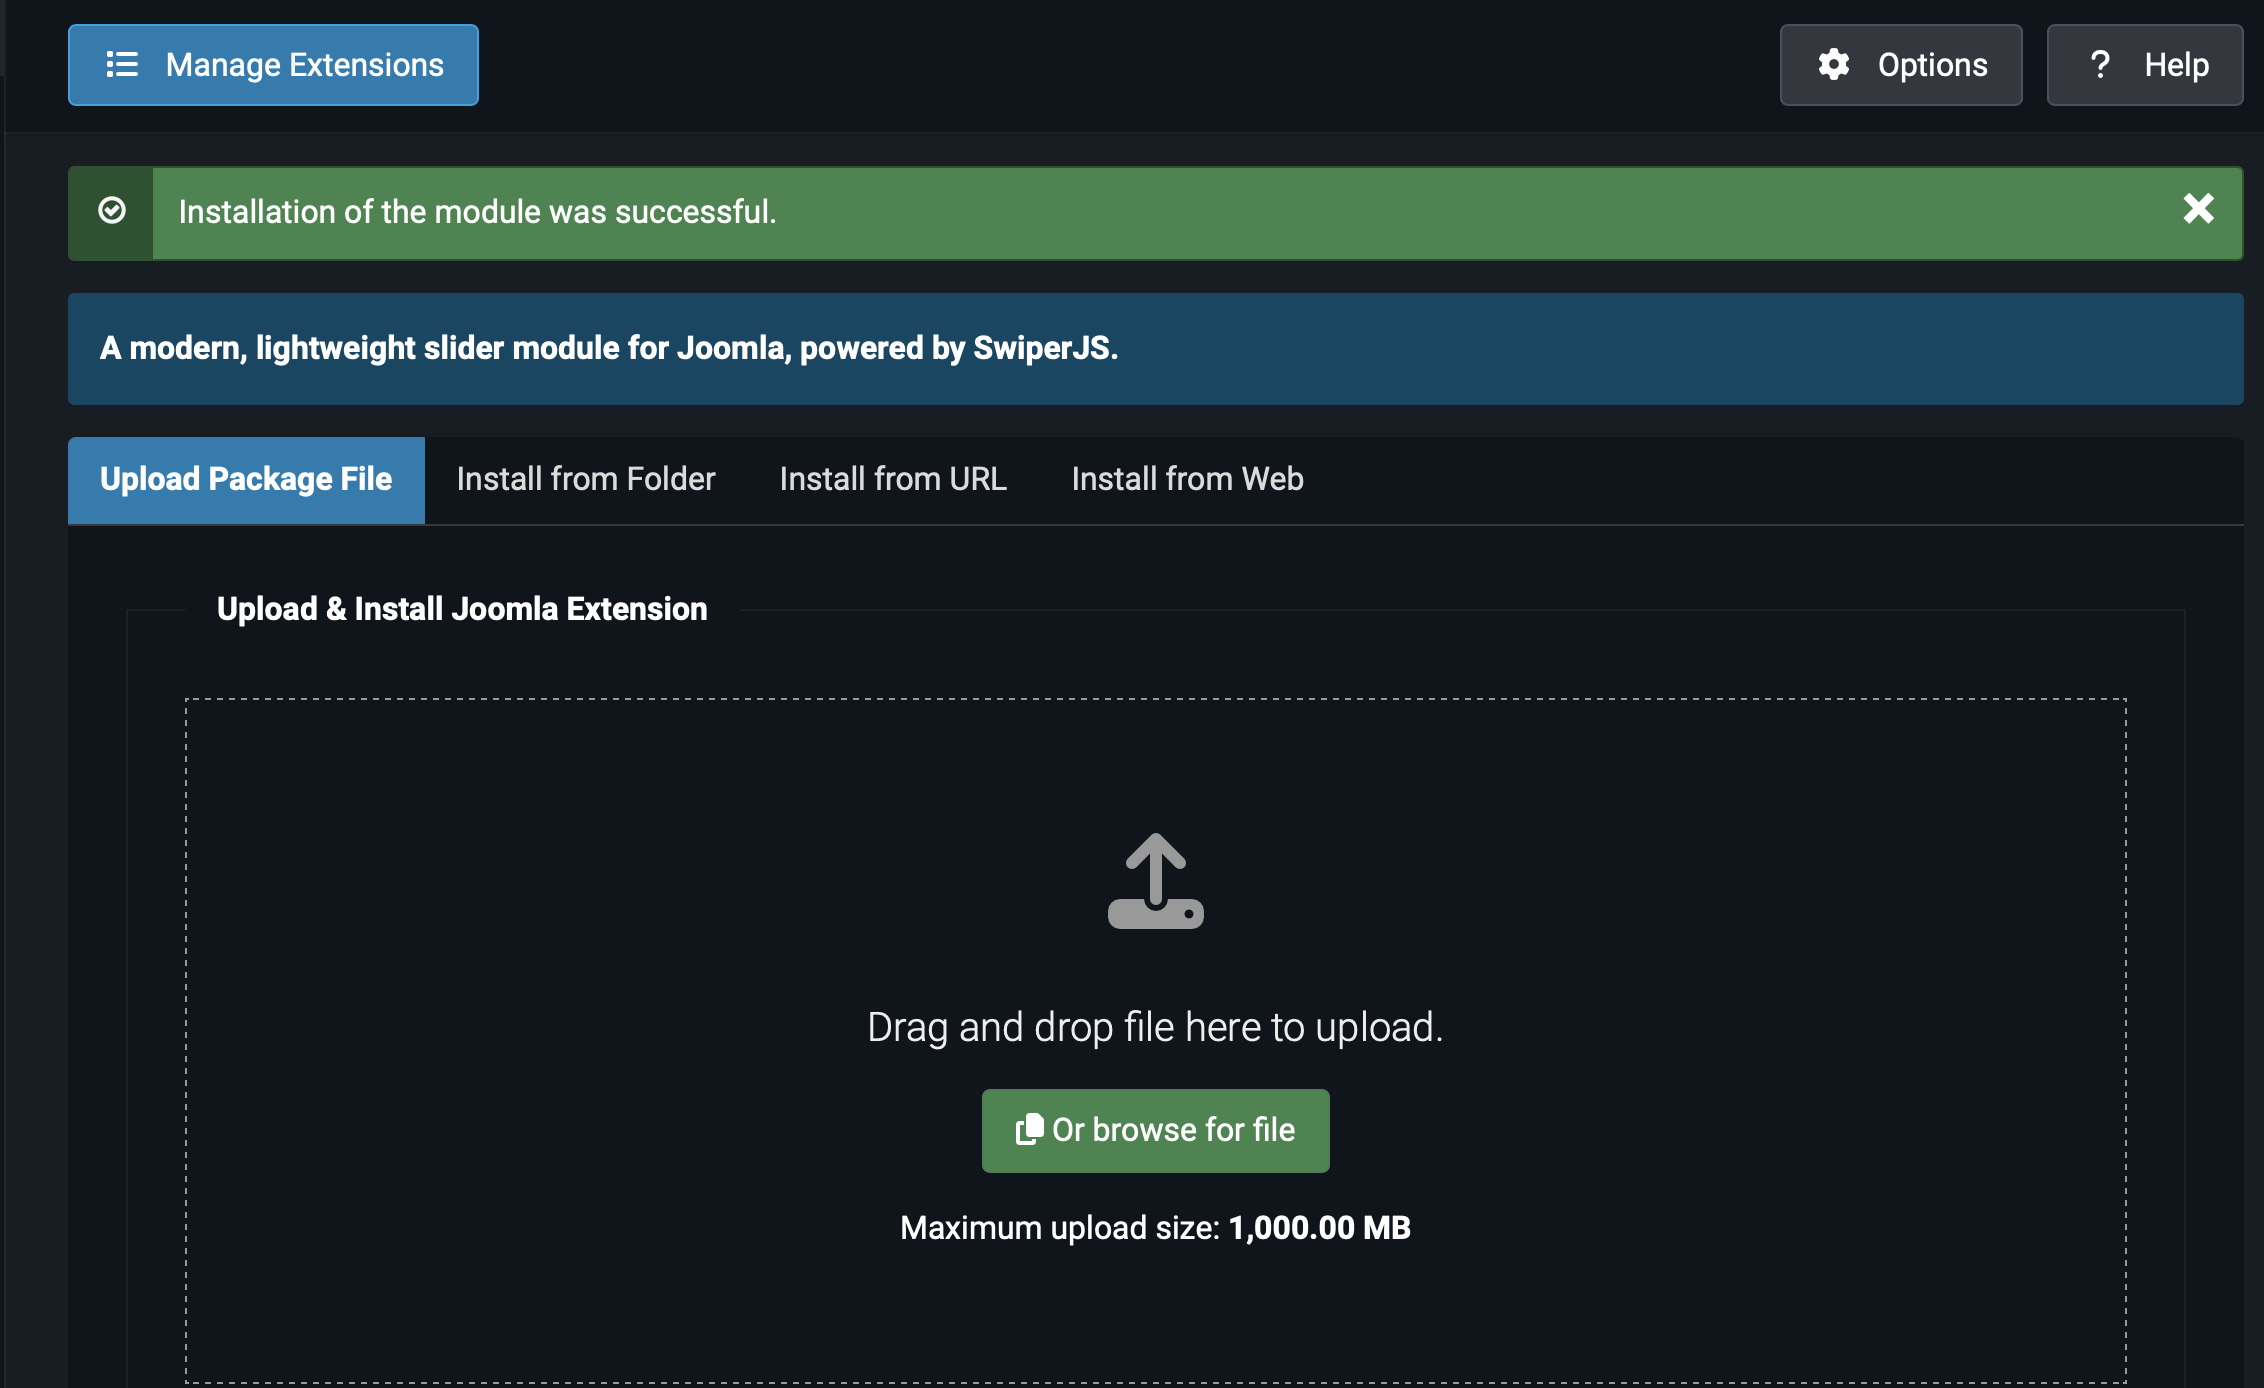
- Go to System → Install → Extensions.
- The default tab is Upload Package File. Either drag the ZIP into the drop zone, or click Or browse for file and select it from your computer.
- Joomla unpacks the archive and installs the module. A green success message confirms the install.
upload_max_filesize in php.ini may be too small. The package is under 100 KB, so this is rare — but on some shared hosts the limit is set absurdly low (2 MB or less). Increase it in System → Server Information if needed, or contact your hosting provider.Verify the installation
To confirm the module is registered:
- Go to System → Manage → Extensions.
- Filter by Type: Module and search for
vp swiper. - You should see VP Swiper Slider (and VP Swiper Slider Pro if you installed both) with a green status indicator.
The module is now available for creating instances. To create one, follow the first slider walkthrough.
Automatic updates
VP Swiper Slider registers an update server with Joomla during installation. From v3.0.0 onwards, Joomla will check for new releases automatically.
Checking for updates
- Go to System → Update → Extensions.
- Click Find Updates. Joomla connects to the update server and lists any available updates.
- If a newer version of VP Swiper Slider is available, it appears in the list with a checkbox.
- Click the version number to open a modal with the changelog — see exactly what's changed before installing.
- Check the box and click Update to install.
Joomla downloads the new ZIP, verifies its checksum against the update server's manifest, and replaces the installed files. Your module settings and slide content are preserved across updates.
How the update server is structured
For the technically curious: the update servers are hosted at:
- Free:
https://vpjoomla.com/updates/vp-swiper-slider/update.xml - Pro:
https://vpjoomla.com/updates/vp-swiper-slider-pro/update.xml
Free archives are distributed through GitHub Releases; Pro archives are served directly from vpjoomla.com. The update server URL is automatically registered in your Joomla site via the <updateservers> block in the module manifest — no manual configuration needed.
Verifying the download (optional)
For users with strict security requirements, each release ships with a SHA-256 checksum so you can verify the archive hasn't been corrupted in transit or tampered with. This step is optional — Joomla's automatic update system already performs integrity checks behind the scenes.
To verify manually, after downloading the ZIP:
macOS / Linux:
shasum -a 256 mod_vp_swiper_slider_v3.0.0.zipWindows (PowerShell):
Get-FileHash mod_vp_swiper_slider_v3.0.0.zip -Algorithm SHA256Compare the output against the expected checksum for the release:
| Package | SHA-256 |
|---|---|
mod_vp_swiper_slider_v3.0.0.zip (Free) |
e3bb9edf6b87779fd672443ecc8bea45d121f3d6d85abc44d766b6d035cacb38 |
mod_vp_swiper_slider_pro_v3.0.0.zip (Pro) |
3a2f07a4a61cd48609b80a037ec7e6d5b4142bf1adcdf68309c217c6f32fe739 |
Checksums for newer releases are published in each GitHub Release description.
Uninstalling
To remove VP Swiper Slider:
- First, unpublish any module instances that use it under System → Site Modules.
- Go to System → Manage → Extensions.
- Filter by Type: Module and find VP Swiper Slider.
- Check the box next to it and click Uninstall in the toolbar.
Joomla removes the module files and the database row for the extension itself. Module instances (the actual slider configurations you created) are deleted along with the module — back up any slide content you want to keep before uninstalling.
Next steps
With the module installed and updates configured, you're ready to start building. Continue with:
- Getting Started — create your first slider in five minutes.
- Content Sources Overview — when to use each of the five sources.
- Transition Effects — Slide, Fade, and the five 3D effects available in Pro.
If you have questions, email support@vpjoomla.com or open an issue on GitHub.