VP Social Login - Installation & setup
Install VP Social Login as a single package, enable its plugins, and review the general settings. Setting up the individual providers comes next, one article each.
Install the package
VP Social Login ships as one installable package that contains the system plugin, the user plugin and the module.
- Download
pkg_vp_social_login-vX.Y.Z.zipfrom your VPJoomla account. - In Joomla, go to System → Install → Extensions.
- Drop the ZIP onto Upload Package File.
Joomla installs all three extensions at once and keeps them on the same version.
Because it's a package, future updates arrive as a single one-click update under System → Update → Extensions — all three parts move together.
Enable the plugins
After installation the plugins are present but disabled. Enable them before anything will show on the site:
- Go to System → Manage → Plugins.
- Search for
VP Social Login. - Enable System - VP Social Login and User - VP Social Login (Connected accounts).
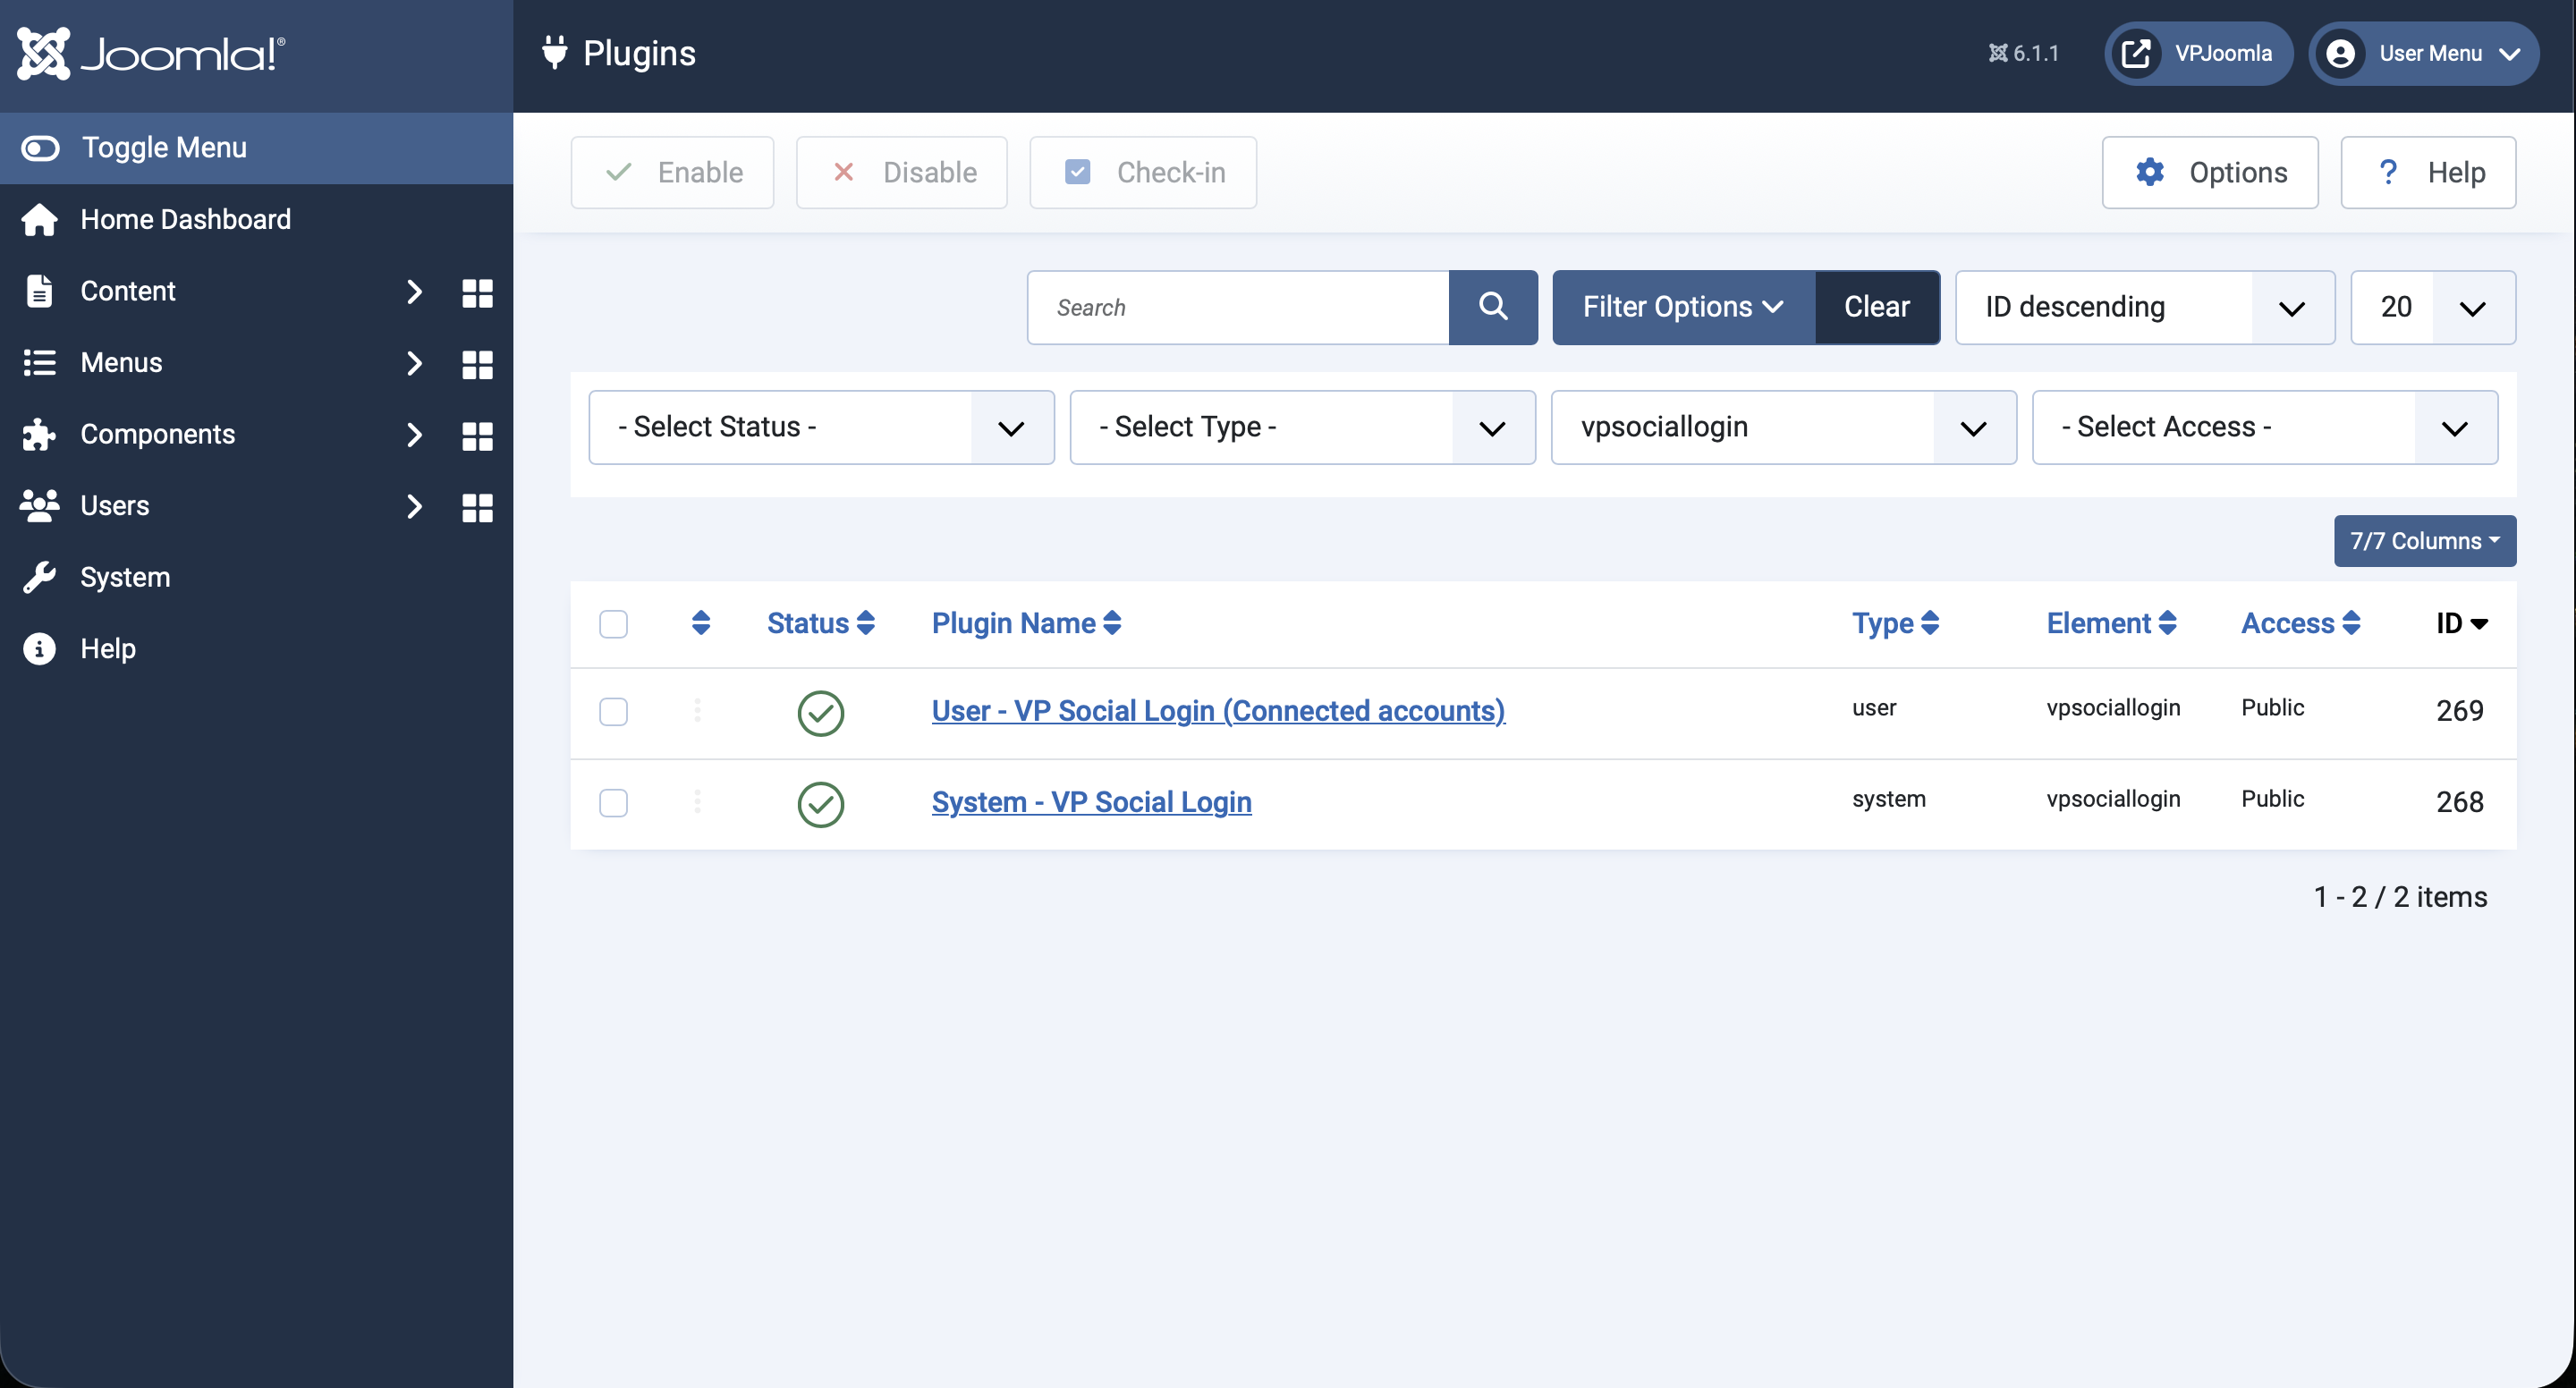
The System plugin is required for everything. The User plugin is only needed for the Connected accounts panel in the profile — but it cannot work without the System plugin enabled.
General settings
Open System - VP Social Login and stay on the Plugin tab. These options apply to every provider:
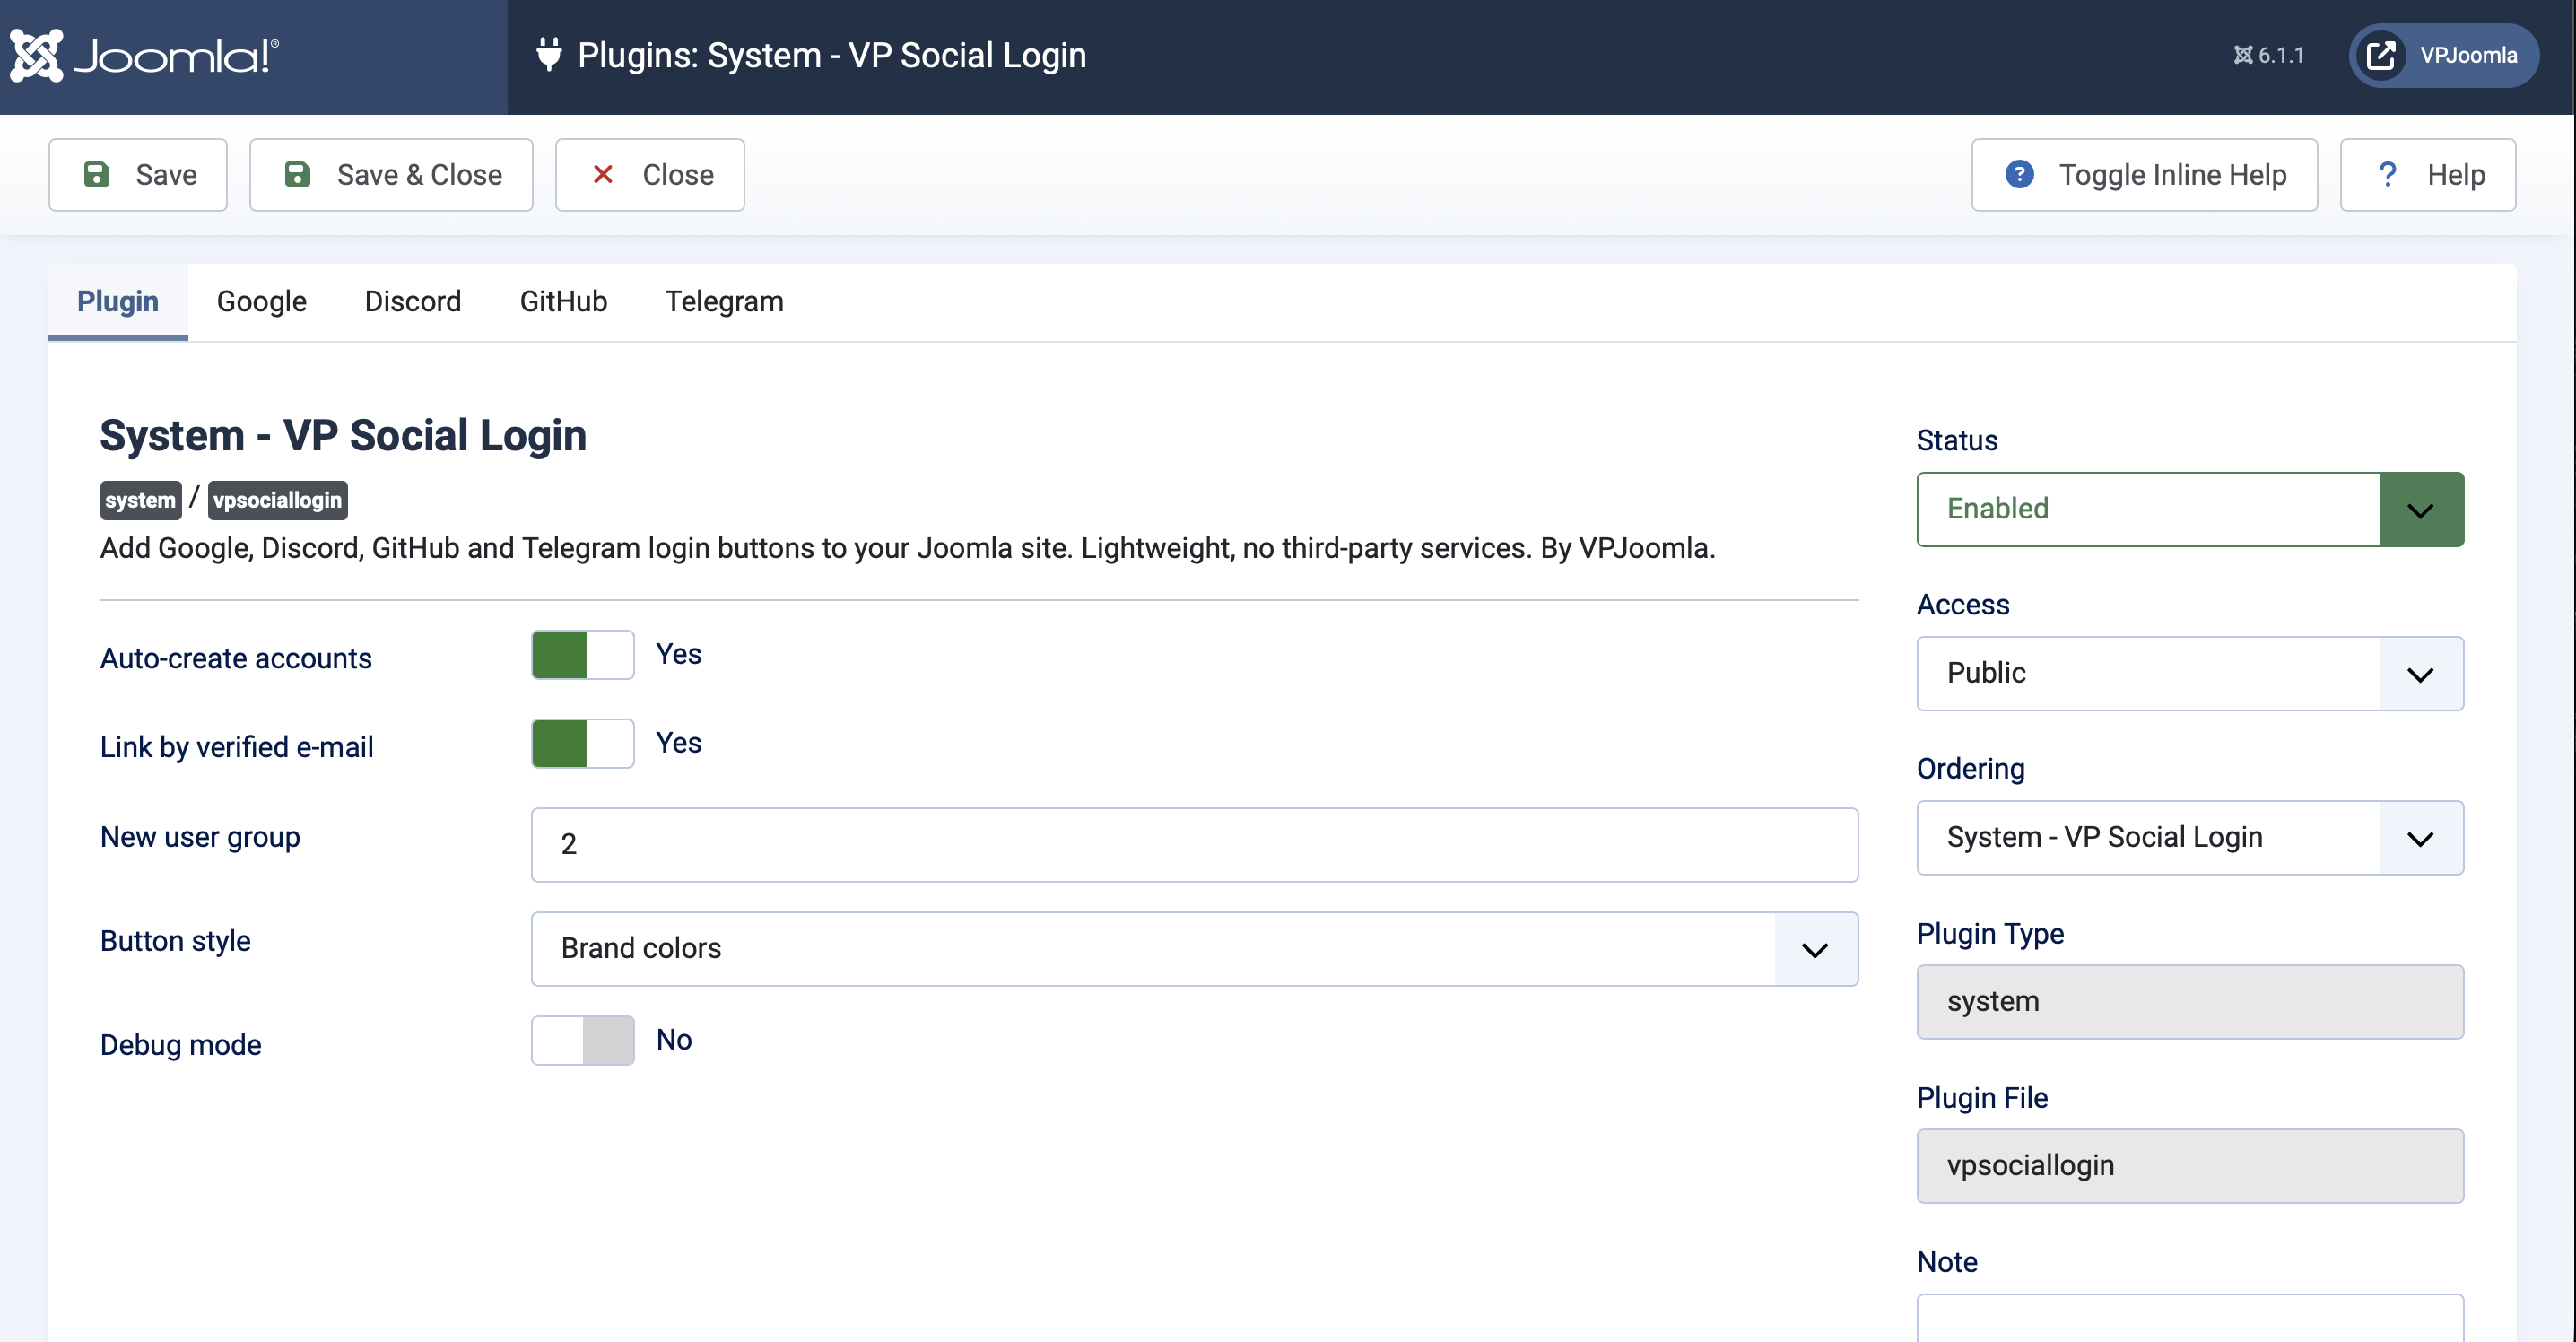
| Setting | What it does |
|---|---|
| Auto-create accounts | Create a Joomla account automatically on the first sign-in when no matching account exists. Turn off to allow only existing users to log in socially. |
| Link by verified e-mail | If a provider returns a verified e-mail that matches an existing account, link to that account instead of creating a new one. Only verified addresses are matched. |
| New user group | The user group assigned to accounts created through social login (for example 2 = Registered). |
| Button style | The look of the buttons in the module: brand colours, outline, or icon only. |
| Debug mode | Show the technical reason on screen if a sign-in fails. Use only while diagnosing, then switch it off. |
Next: set up a provider
Each provider needs its own OAuth application (free to create). Enable only the ones you'll use, then follow the matching guide: