VP Social Login - Configuring Google login
To enable Google sign-in you create an OAuth client in the Google Cloud console, register VP Social Login's redirect URI, then paste the Client ID and secret into the plugin.
Before you start
Open System - VP Social Login in Joomla, go to the Google tab and switch Enabled on. The tab shows the exact redirect URI you'll need in a moment — keep it handy.
It looks like this (with your real domain):
https://your-site.com/index.php?option=com_ajax&group=system&plugin=vpsociallogin&format=raw&vpsl=callback&provider=googleCreate the OAuth client
- Go to the Google Cloud console and select or create a project.
- Open Google Auth Platform. If you haven't used it before, configure Branding (your app name and support e-mail) and Audience first.
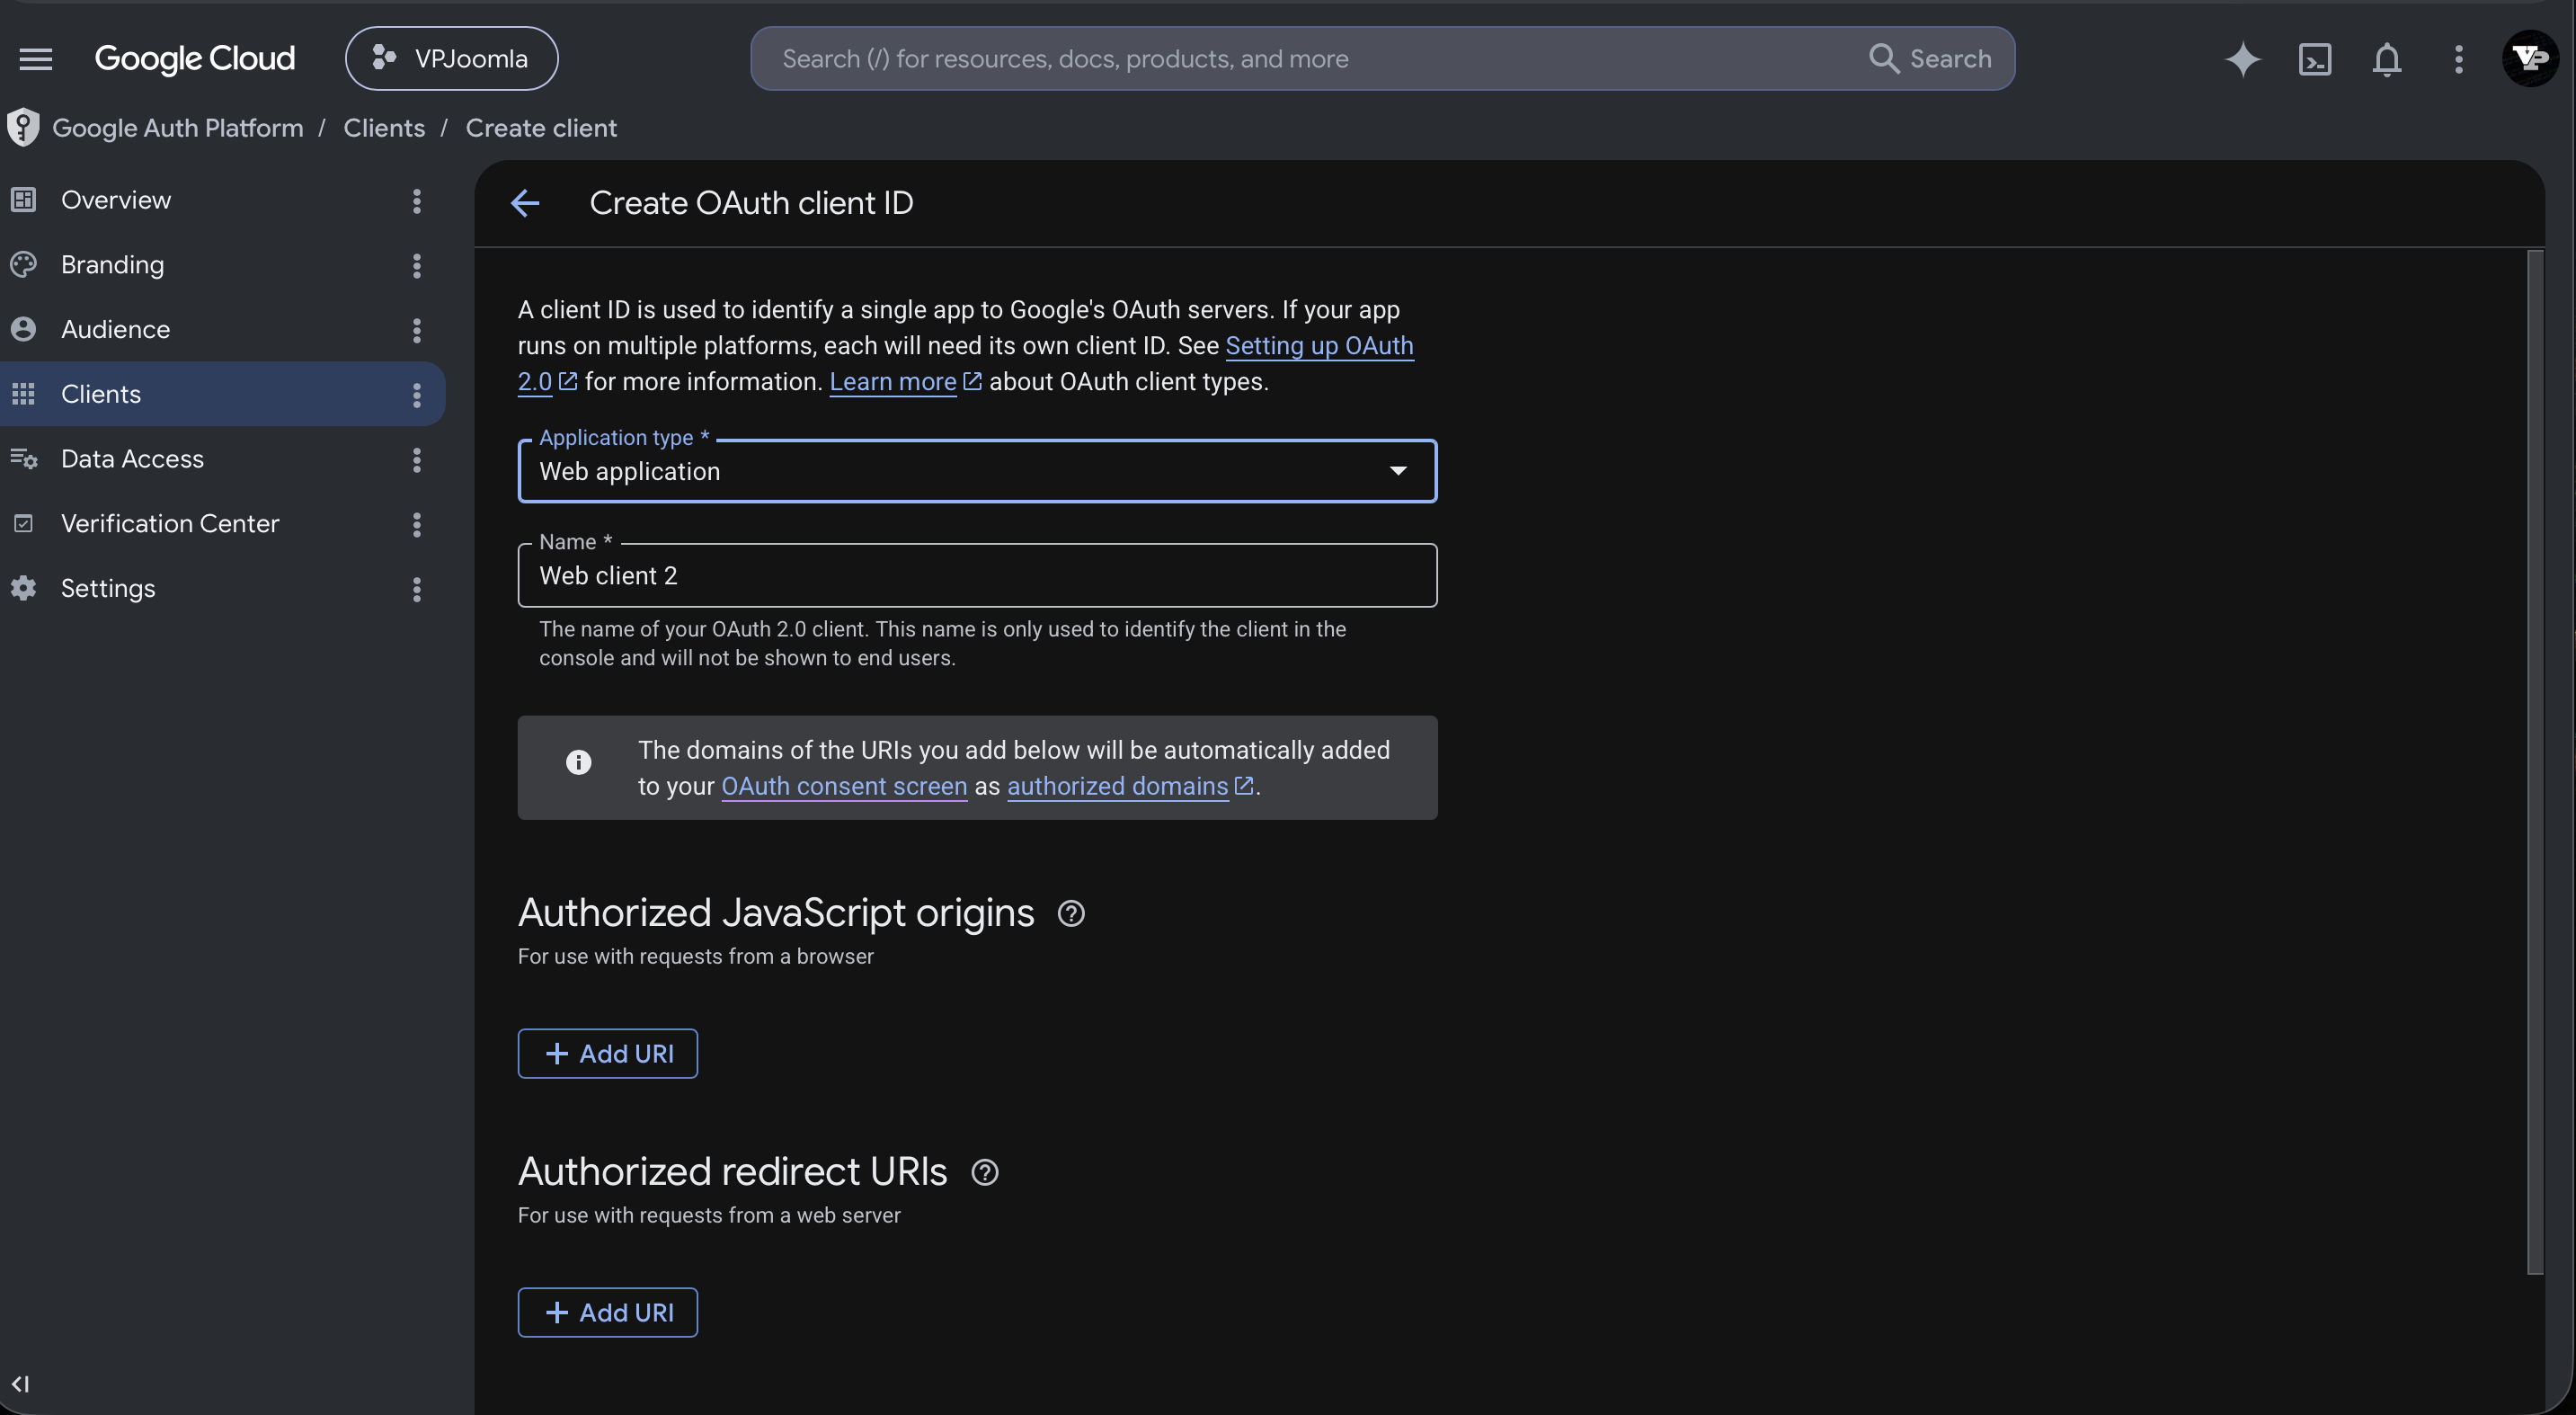
- Go to Clients → Create client.
- Set Application type to Web application and give it a name (only you see it).
Add the redirect URI
Under Authorized redirect URIs, click Add URI and paste the redirect URI from the Google tab (the one ending in provider=google). Leave Authorized JavaScript origins empty.
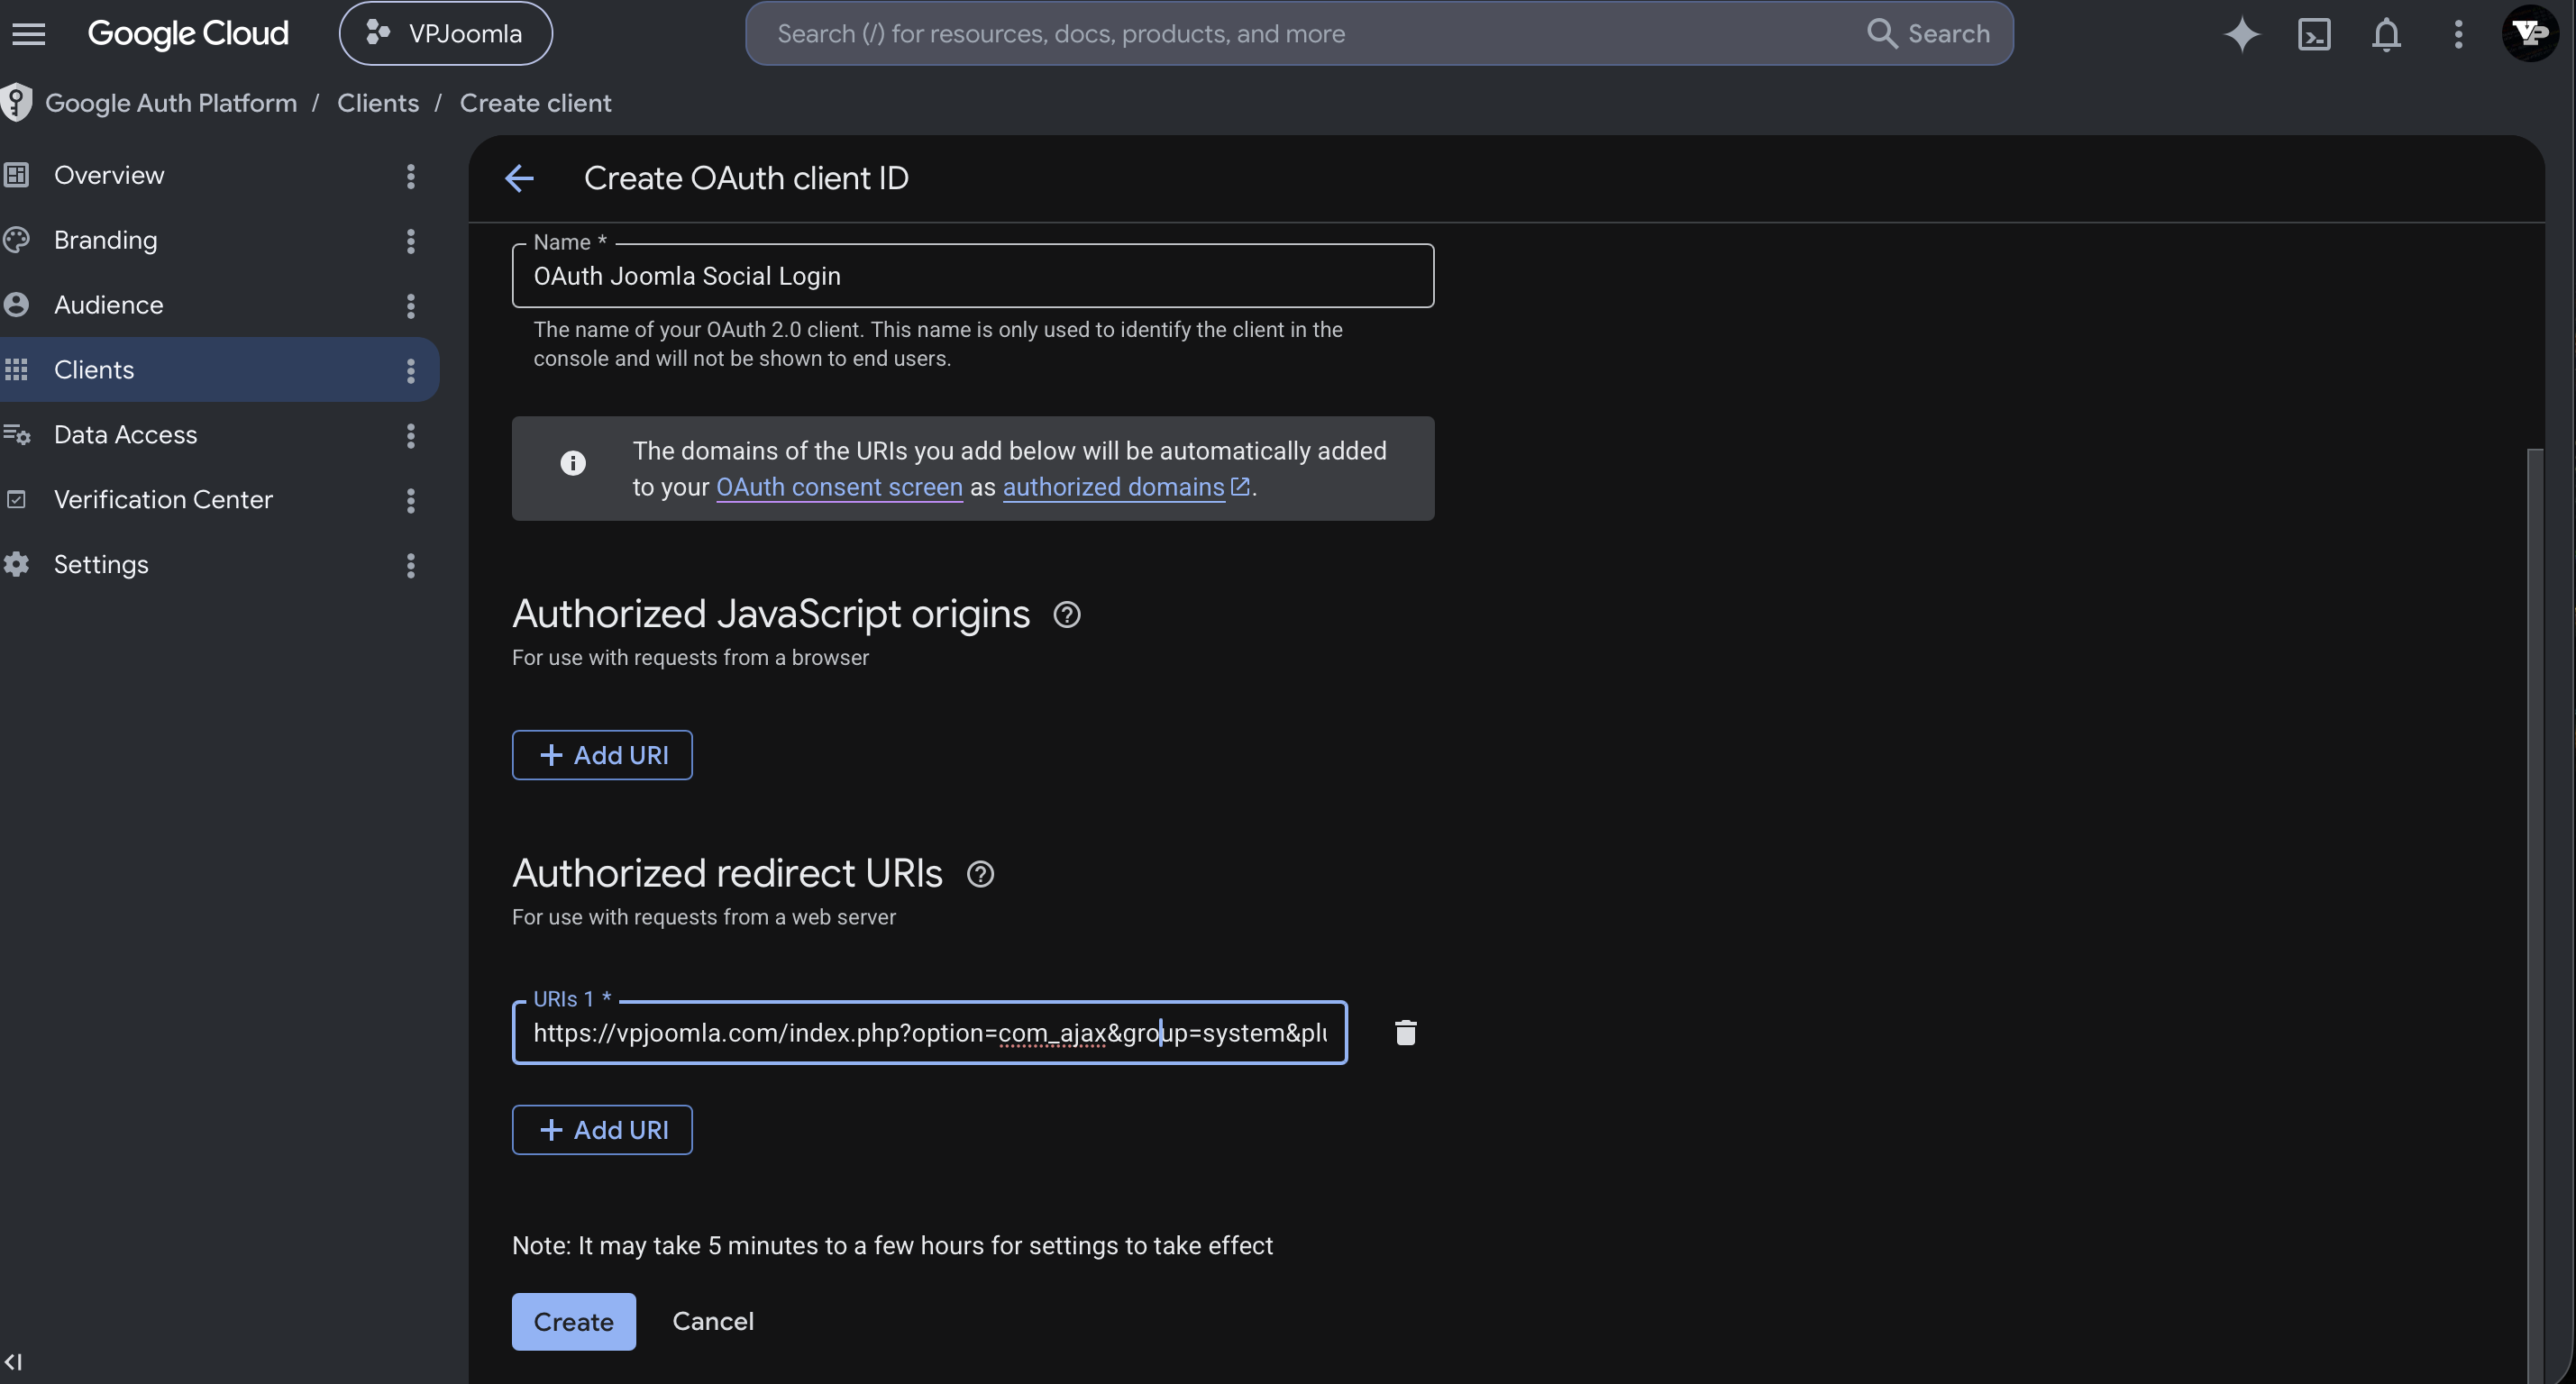
The redirect URI must match character for character, including https:// and your real domain. A mismatch is the most common cause of a redirect_uri_mismatch error.
Copy the credentials into Joomla
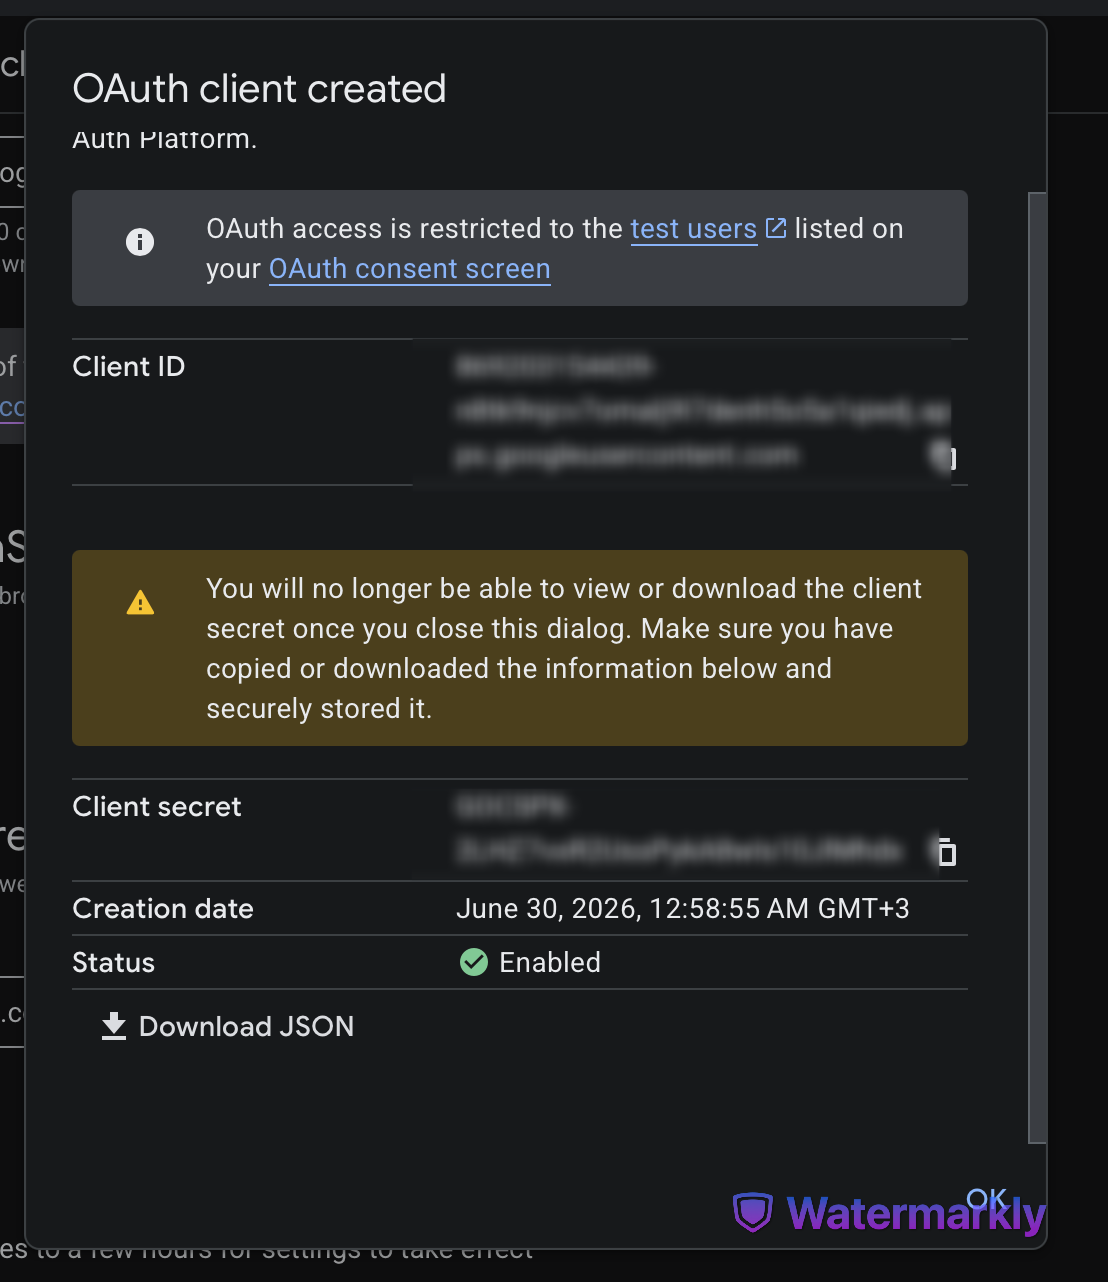
Click Create. Google shows your Client ID and Client secret.
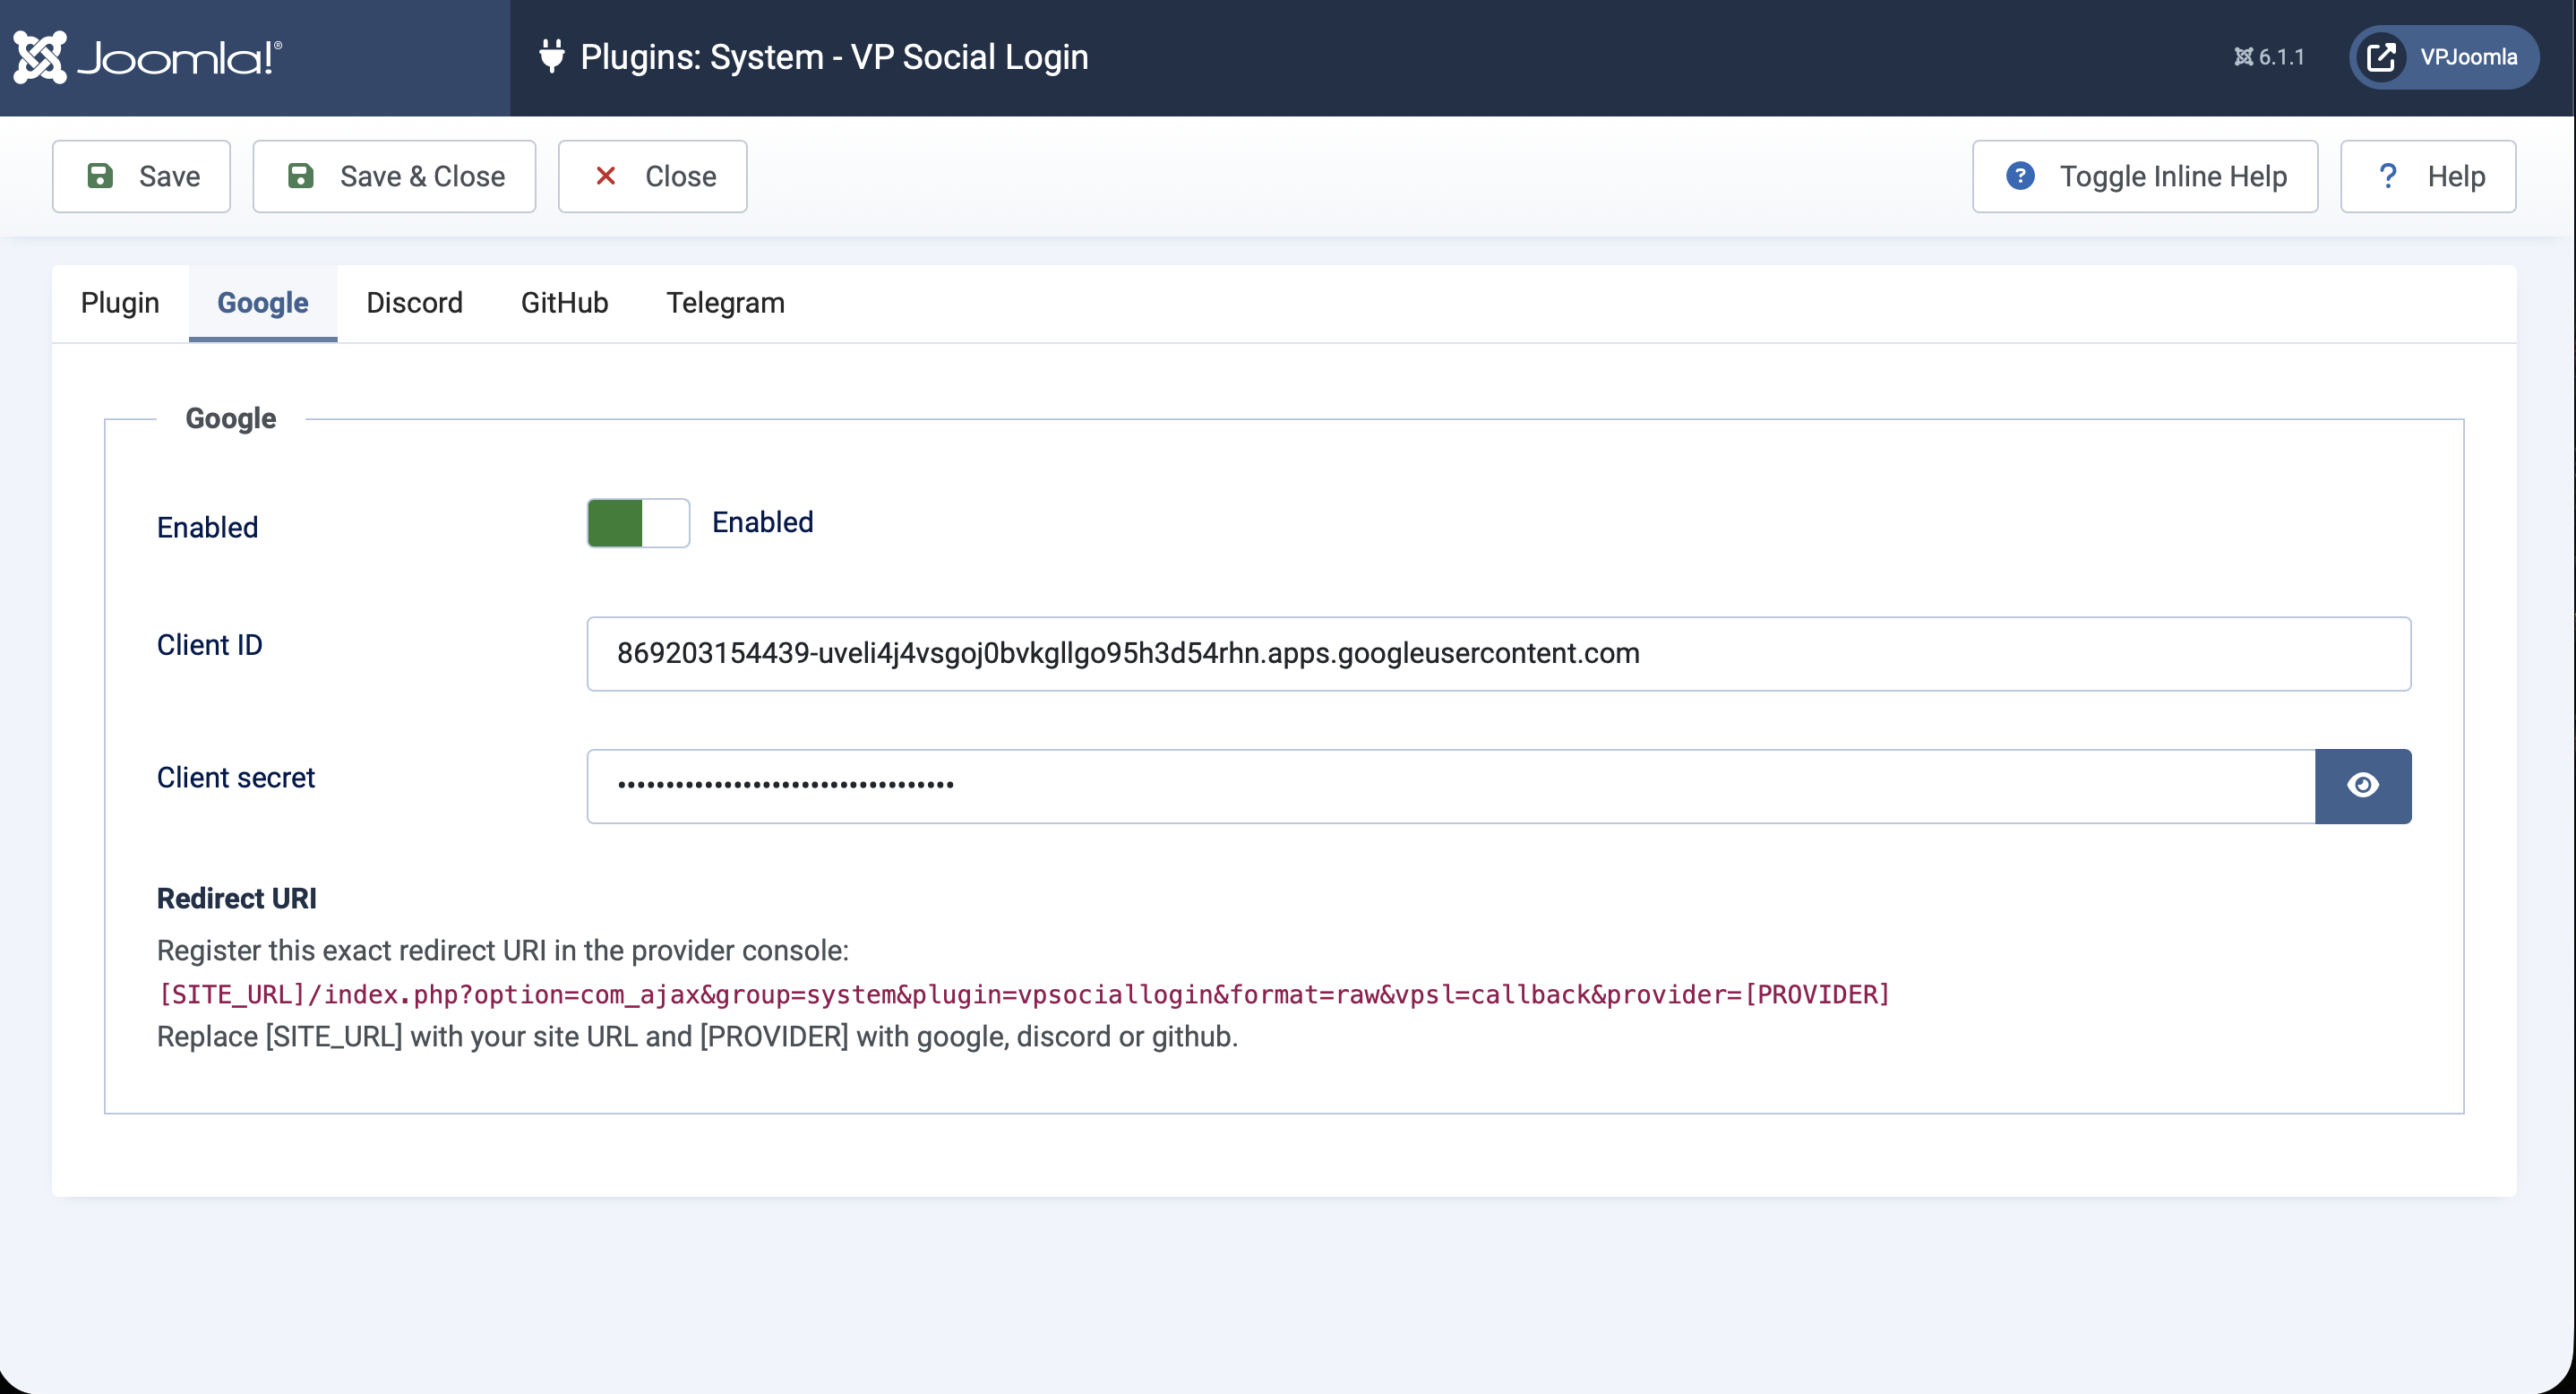
Back on the plugin's Google tab, make sure Enabled is on, paste both values, and Save.
Test it
Log out, open your site's login page, and click Continue with Google. You should be sent to Google, then returned and signed in.
While your Google project is in Testing, only the test users you add can sign in. Publish the app (Audience → Publish) to allow everyone.